Every Blogger when begins his blogging career, starts from very basic platform such as BlogSpot. I too began my blogging drive with BlogSpot only. Slowly when I discovered all the essentials of BlogSpot, I reconciled that it was the right time to plan something big. That was the first time when I came across WordPress. WP is an exceptional platform with thousands of plug-ins and helping aid that can be used to make blogging an amazing experience.

WordPress has a plethora of brilliant features that help bloggers to enhance their work and the add-ons are quite advantageous in many ways. After you know how to install WordPress, you can go ahead with the installation process. It is quite easy and you can get it installed in your computer in a short span of 5 minutes, if you know the right approach.
Best part of WordPress is that you can find uncountable tutorials at internet. These tutorials are quite classified in their explanation of How to install WordPress that you don’t have to come across any trouble to implement the process. In addition to the WordPress series, here are some of the primary settings that you have to do after installation.
Primary Settings of WordPress for Newbies
I remember when it was me, I was learning WordPress and its settings, and it was so much fun. There are some settings that you will learn in this guidebook and some that you will learn with consistent practice in WordPress Blogging. For example, settings such as Window live writer and desktop blog editor will take some time to fit in your brain. Moreover these are not among the basic works. With my experience of Blogging with WP, I have put together all the basic settings, you can take a look:WordPress Permalink:
Before I proceed, I would like you to know about What is Permalink?
Permalink or Permanent link is the URL of your blog that has been added to the database or archives. It is the permanent URL that is given to every blog that is why it is unique. The term “Permalink” is most common on the blogosphere whereas other websites refer the term as “Permanent Link”.
Permalink Settings in WordPress
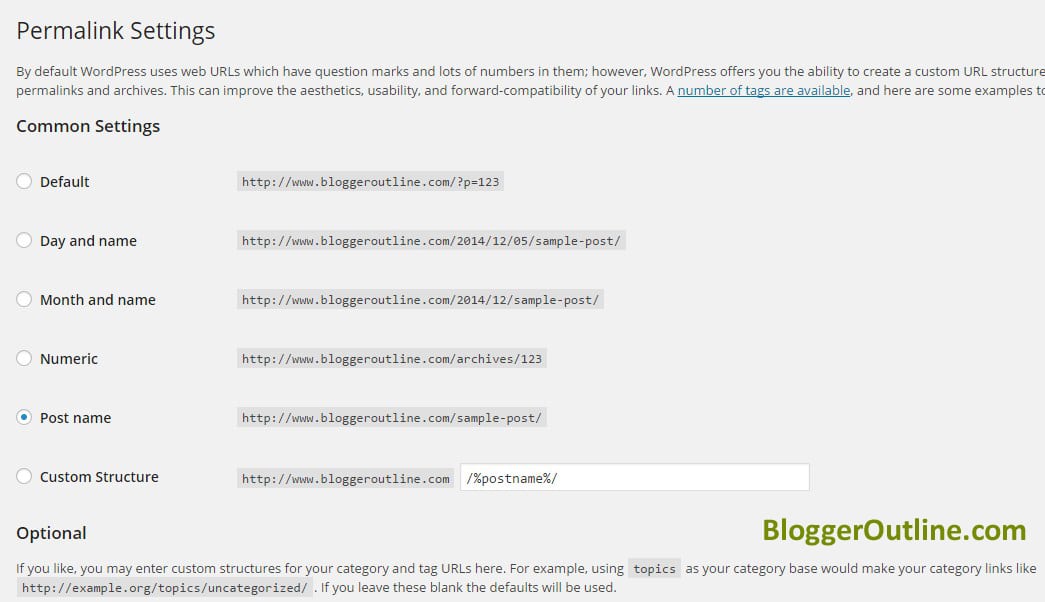
As per the initial settings, I would suggest that you must change default permalink to custom permalink. If you do not change default link then it will appear in below mentioned format, and this format is not search engine friendly:
Format: https://bloggeroutline.com/p=789
This is just the example of the format that will appear. It is always best to use permalink with the name of your post. With the previous version of WordPress, permalink settings were a little troublesome. But the latest version has overcome these bugs very well.
Ways to Change settings
- Go to settings in WordPress
- Click at Permalink
- From the menu, select the post name
- Click at save option
In this way, you have just made some elementary settings of permalinks. The link will contain your blog’s keyword that will help in attaining high results in Google searches. For the ones that have not used custom permalinks for their blogs can change them with the help of 301 Redirection process.Change Admin User for Security:
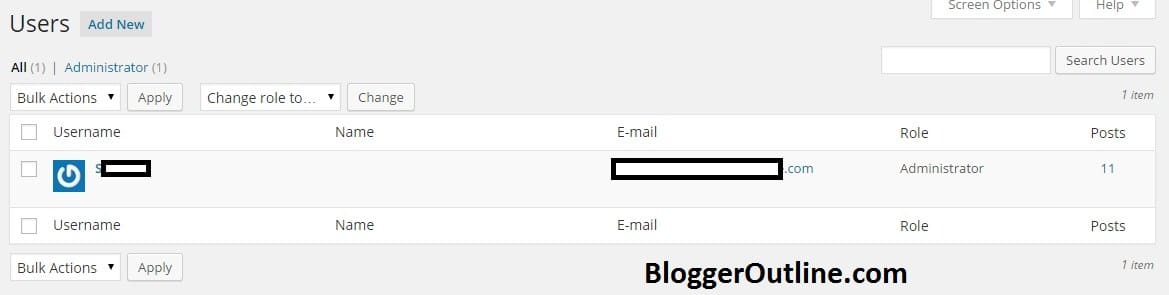
Security of your blog is prime concern for every blogger. So, I will here tell you the way to change admin user for security. While learning how to install WordPress, it is suggested to learn security setting as well, to protect your blog from a brute attack. To ensure total protection of your account you must follow below stated process:
Ways to change settings
- Create a user and give it all the admin rights
- Login with the user’s ID
- Delete default admin account
For excellent protection, you are suggested to use a complex password rather than using obvious and simple one.Disable User Registration:

For all the sites that allow provision of guest posting, it is recommended to keep user registration open. While learning How to install WordPress, you must know whether you want to allow guest posting or not. This will help you in learning related settings in WP. It is good to keep registration open but spam registrations are such a headache. It depends upon you and your blog type, if it has a requirement of guest blog or not. If Guest blogging is not required then you must disable user registration by following below written steps:
Ways to change setting
- Go to Settings
- Select General from the settings option.
- Uncheck anyone can register from Membership option
Time Settings:
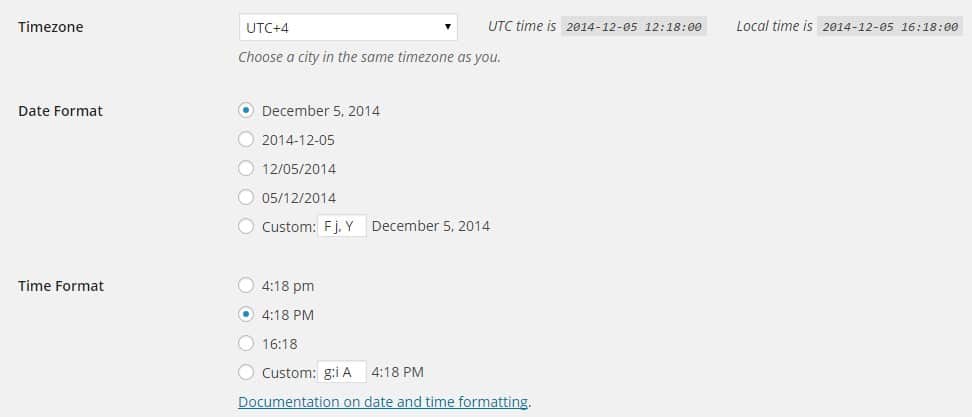
Time Zone settings are required to schedule your post. Sometimes, you want your post to go online at odd hours when it is difficult for you to manually post the blog. In such a case, scheduler can help you in automatic posting of your blog. Simply follow the steps:
Ways to change settings
- Go to Settings
- Go to General settings
- Click at Change time zone
You must keep time zone matching to your country. It will give you a provision to schedule your blog at any hour and the post will go online automatically.WordPress Threaded Comment:
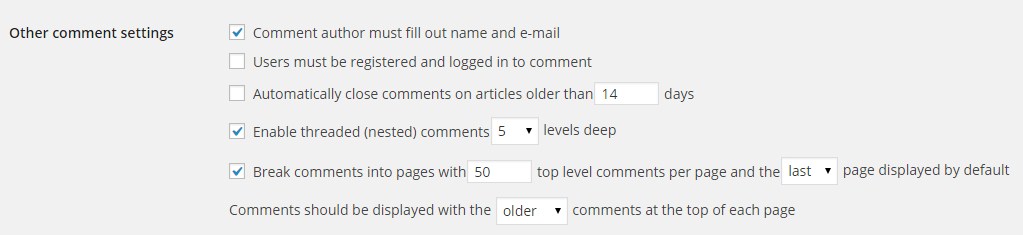
Basically blogs allow two types of commenting to the readers. First one is Original Comment and second is Threaded Comment. According to original Comment, readers can write only one comment on each blog whereas threaded comment allows users to discuss the blog and reply to other users comments. According to today’s blogging and WP latest version, all blogs are supporting Threaded Comments. It also helps in retaining readers at your blog for longer duration.
Ways to change settings
- Go to Settings
- Visit Discussion Tab
- Enable the checkbox of “Threaded comment and break comments”
Update WordPress Ping List:

According to the default ping services, users are allowed to notify about services by using the ping list. WordPress Ping list 2019 is available now on BloggerOutline. You can simply copy and Paste it in your WP admin. It is also possible for you to write your own ping list. For that, you just have to go to Settings and click at Writing. Every time you post a blog, all the services are notified automatically. This will increase online exposure of your blog. WordPress ping list updated for 2019 is available Here.Comment Gravatar:
Gravatar is a feature for which, you must use images in your comments. Use of these features is that you will get images of the users that signed up for Gravatar. In such a case, image will only be visible to the ones that have signed up. To socialize your work more, you must change the settings from default to Discussions so that every person visiting your blog can see the images. Simply go to Settings and visit Discussions and change them to default.
Note: After doing all the elemental settings, you can then begin with installing plug-ins. It will be better if you make a list of plug-ins that you require for your blog. You must install SEO by Yoast and W3 Total Cache Plug-in. Both these plug-ins are also a part of the basic structure.
Well Bloggers, this was all about basic settings. But before this, you need to know about how to install WordPress as installation is the primary step and how to write a persuasive Blog. Happy Blogging!